

I've been noticing quite a few throw pillows with ruffles and fabric flowers around blog land lately. As I studied these pillows, I realized that I had somewhat unknowingly left any
kind of romantic-homes-style decorating at the altar.
I think being married to a guy who loudly and proudly states his intense dislike for frills and lace
will do that to ya!
Well I determined to get back in touch with the inner girly-girl that I know still lurks there and decided to whip something up one afternoon. I had a nicely textured remnant that I thought would fit the bill. As I started cutting, pinning and sewing, I had a good laugh at myself. "Whipping something up" is what I did when I was single and could eat a handful of grapes for supper and eat said supper at midnight if I wanted. Not so much with a one yr. old and a two yr. old that are both very determined to see exactly what Mommy is doing at the very closest angle possible.
Here's how I did it...I sort of apologize for the 501 photos...but I blog like I tell stories...way too many descriptions and details! I tend to find tutorials easier to understand if I can study the pics.

To make the fabric roses, cut long strips in your fabric of choice. I like the frayed look, so I didn't want to hem the sides. My strips were roughly 2" wide by 24" long. Give yourself a little "tail" and then fold over like in the picture. I can NOT for the life of me think of what it's called.

Wrap the fabric around itself and keep doing those little quarter folds...I'll call them that cause I still can't think of the right term - if there is one.


Tack it together at this stage so that the center stays put.

Keep folding and wrapping until you get the size rose you like. Make sure you vary where you fold, other wise you'll end up with a very square flower. Experiment a little until you get the look you like.
Donations for a manicure gladly accepted.
I kid.
Sorta.
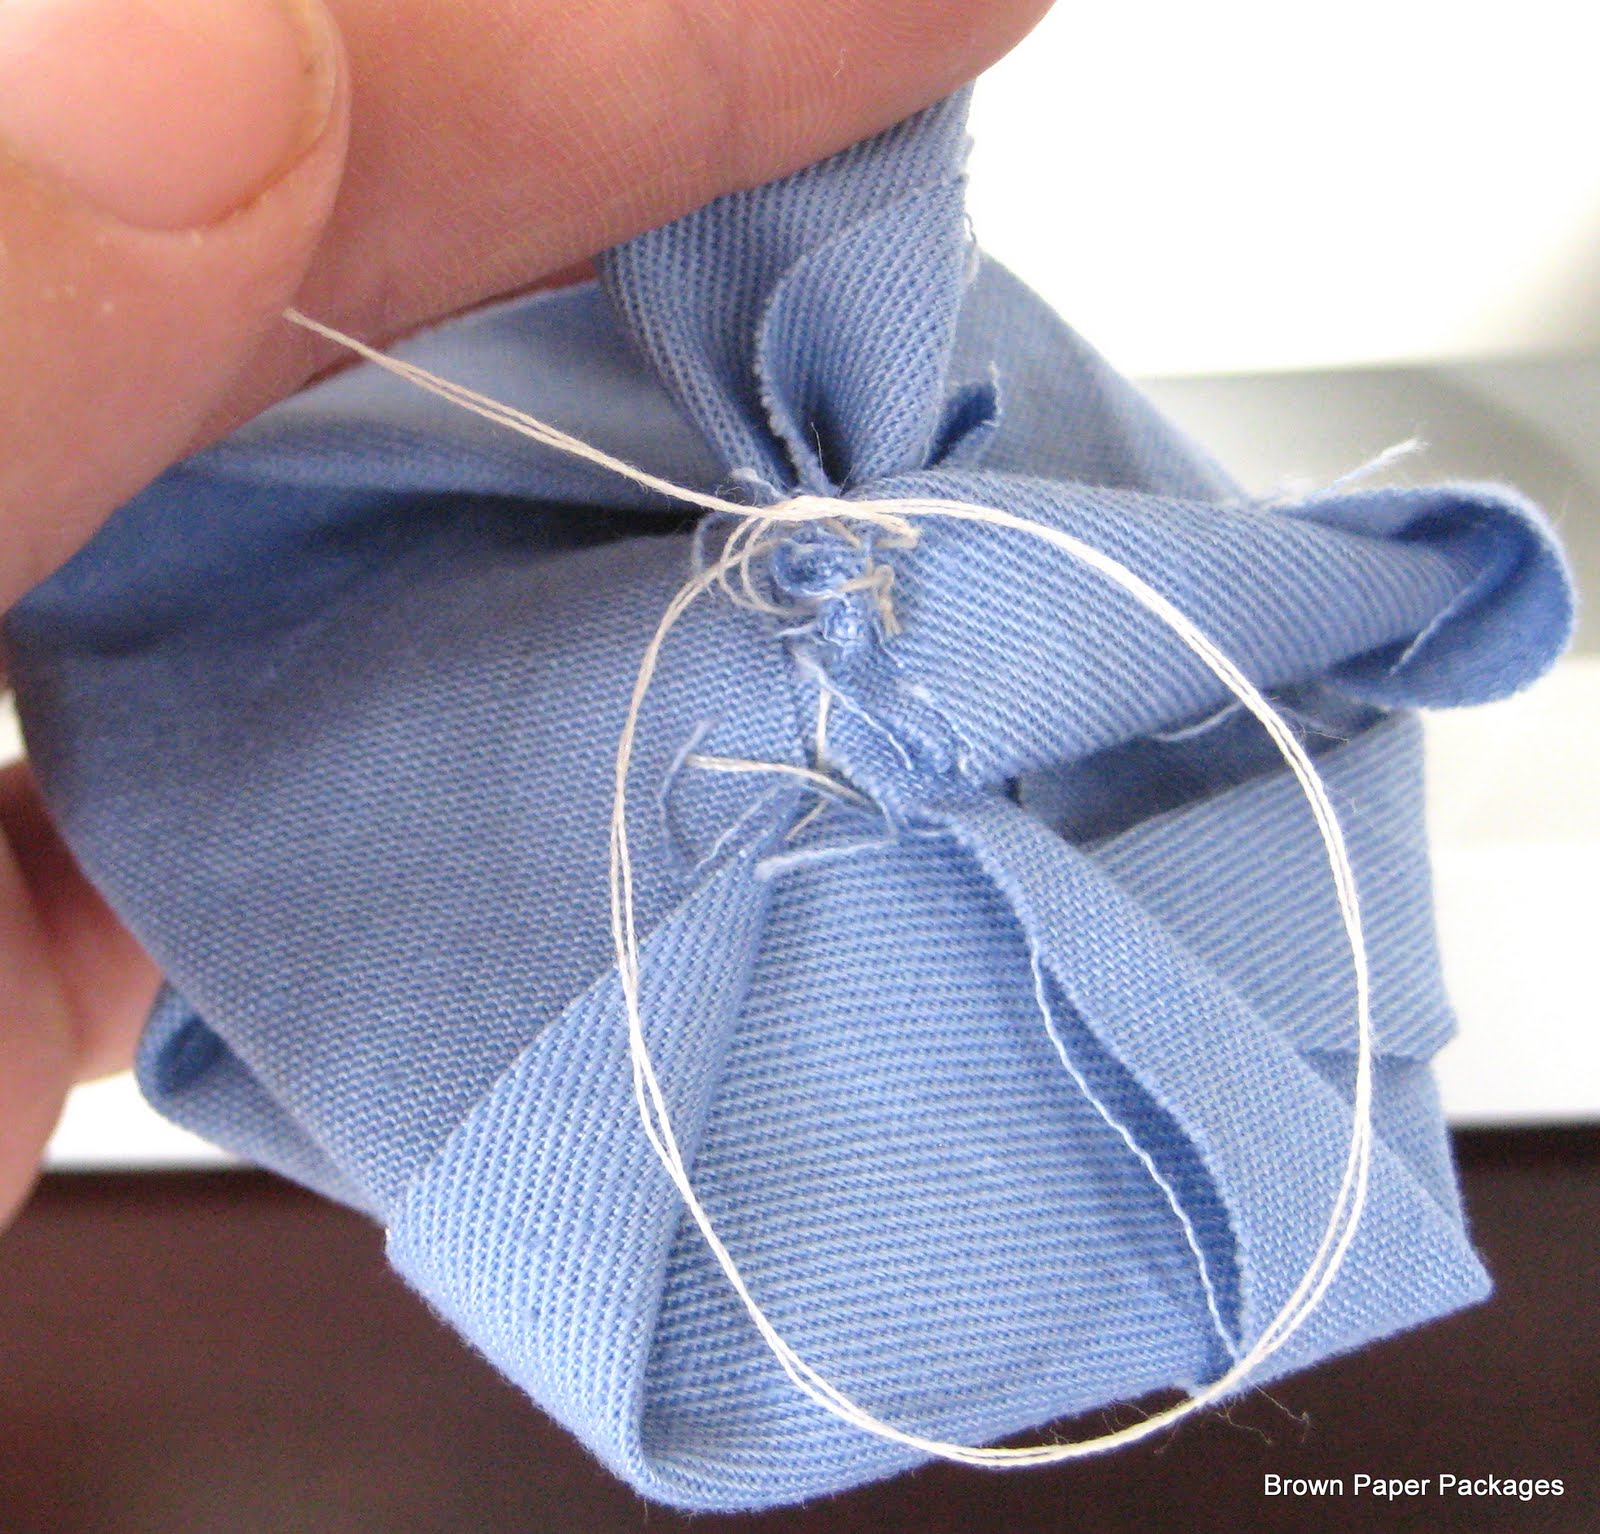
When you are happy with the size and shape of your rose, wrap the thread around the tail and tack together with a few stitches. Cut the tail/stem down to about 1/4" below the base of the rose.

See my cute little "helper"?!
Make as many roses as you want for your pillow.
Once you get the hang of it, they are super fast and easy to put together.

I made three and varied the sizes slightly. I love the frayed edges showing through!

Now it's time to start on the pillow! I was trying to put this together as quickly as possible, so I did not do a professional job by any means. My grandma would be horrified if she could see this!
Anyhow - measure your pillow insert and cut your fabric according to size, adding a half inch seam allowance on every side. I did an envelope style, meaning that I cut two pieces for the back instead of one. Those two pieces need to be a bit longer than half the length of your front piece. So in other words, if your front piece is 20" long, the two back pieces need to be around 13" long each.

Next, cut out long strips of fabric. Because I had a remnant, I just cut up everything that was left and didn't measure at all. But if you like measuring, I think the rule of thumb for ruffles is to cut the fabric twice the length of your desired end result. So - if your pillow is 12" tall...cut your strips at 24".
Or do like I did and wing it!

Now going back to your two pillow backs...(are you still with me?!)...I give you full permission to be imperfect and forget the "rules" if you had a fussy teacher like I did!...she'll be getting hives when she reads this (hi Mom!). Fold your edges over 1/4", pin it, then fold it over again, repinning as you go. No need to iron your fold...unless you really like ironing.

Stitch it up so both of the backs have seams like this on one edge.

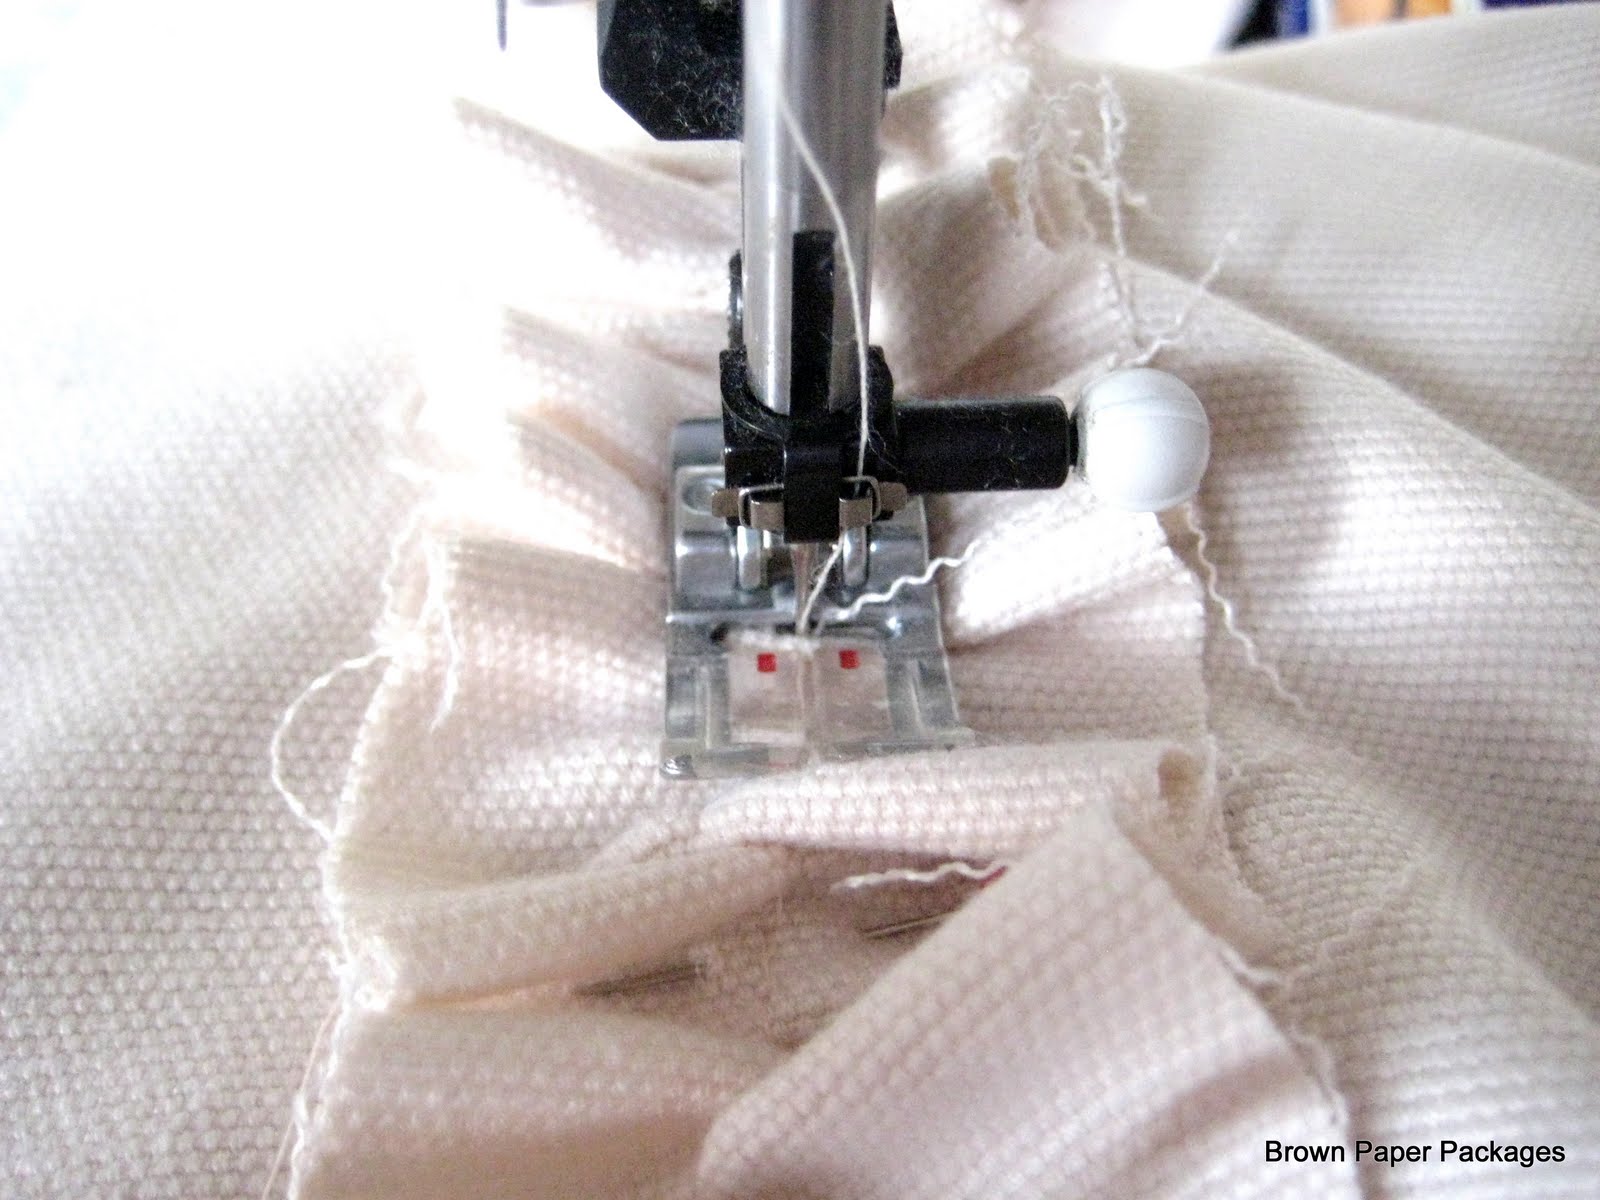
Now move on to your strips of fabric. Set your machine to the largest stitch setting and sew down the middle of each strip. Once you're done sewing, cut the thread and gently pull on the bobbin thread and watch the fabric gather up.
Adjust your ruffles so they are all nice and even.

Take the front pillow piece and pin the first ruffle right down the center on the right side of your fabric.
Carefully stitch together with a medium thread setting.

Lay out your ruffles on either side and adjust them until you get the spacing you like.
Some pillows I've seen had a few inches between each ruffle and some had no spaces at all. I chose to leave about 1/2" between each. Make sure your last ruffle is in far enough that once you sew the pillow together, the edge of the ruffle is flush with the edge of the pillow, not hanging off. You can see what I mean in the picture. Now you know why I take so many pictures. I stink at verbally explaining things!
Once everything is pinned, stitch all of the ruffles in place. Pretty huh?!

Before you stitch the front to the back, make sure you pin the edge of the outside ruffles back, so it doesn't get caught in the seam and look all strange. No strange wanted after all that effort!

Pin your backs to your front, right sides together. Now you can get a better idea of what I mean by an envelope style. The back pieces overlap each other and then the pillow can slide right in.
It's much easier than fussing with a zipper!
Stitch all the sides together and voila! A beautiful girly-girl ruffly pillow!

Next lay out your roses in the pattern you like. I debated between having them in a vertical row down one side and clustering them. In the end I went with a cluster, but you can really do anything you like. Tack the roses into place by freehand stitching the bottom "petals" to the ruffles. I inserted the pillow first so that I could get an exact idea of where the roses would sit best.

And there you have it!
I originally intended to use this cushion on a vintage chair in my kitchen, but decided instead to use it in the guest room. I think it goes pretty nicely on our antique Swedish sofa. And since it's now downstairs, I no longer have to see hubby's face turn green and listen to gagging sounds
every time he looks at all those ruffles.
See? It all works out in the end!

I'm really loving those roses! I'm thinking they'd be really lovely in a nice stripey blue and white too!

I thought I'd play around a little and create a little vignette...

...but in the end, I preferred the look of the throw and book...

----------------------------------------------------------------
Linking up to Feathered Nest Friday


Such a pretty pillow you made!! Oh and that book looks like a wonderful read!
ReplyDeletebee blessed
mary
Oh my goodness... an amazing tutorial. I will be making this pillow and will show you how it turns out.
ReplyDeleteThere are not enough words for how much I LOVE this pillow!!! The color choice for the flowers really makes it pop. Awesome tutorial too!
ReplyDeleteOh, so cute. I love the flowers against the white ruffles! Adorable and definitely girly-girl--my favorite! Thanks for linking up and have a fun weekend!
ReplyDeleteSo girly and fussy, love it!
ReplyDeleteLOVE this...it is so pretty! Now I know what I'm making for my girl's bedroom. Thanks for all the pictures...they will come in very handy. I found you at Serenity Now...have a great weekend!
ReplyDeleteWow, thanks so much for all the comment love ladies! And thanks for stopping by! :)
ReplyDeleteI love this pillow and tutorial! I featured you on my blog :) I look forward to trying it!
ReplyDeletehttp://onerowblog.blogspot.com/
Oh that turned out nice. It was such a good tutorial too :)
ReplyDeleteBeautiful! I love the blue on white - so pretty!
ReplyDeleteThat is gorgeous! I saved it so maybe one day when I learn to sew I can make one. Thanks for the tutorial!
ReplyDeleteGreat pillow and tutorial, thanks.
ReplyDeleteI am a new follower.
You did a fine job on both the tute's explanations and the photos. Thank you. I've been wanting to make one of these.
ReplyDeleteVery cute and great tutorial. I featured this on my blog tonight.
ReplyDeleteThis has got to be the cutest girly-girl pillow ever! You did an amazing job.
ReplyDeleteWOW! THis is so so pretty! I am a total rookie at sewing but you have inspired me to try ruffles! Just popping in from TT&J :)
ReplyDeleteVery pretty pilllow and great tutorial! I always like to have pictures to study.
ReplyDeletethis is absolutely beautiful, truly!!!You were featured at Katherines Conner today. Hugs and have a lovely weekend!
ReplyDeleteI was "lurking" in blog land and came across your site...I love it! Love this pillow and linked you onto my fb page to share you with others:)
ReplyDeleteMe again...you need a button...I would put you on my blog with one.
ReplyDeleteWhat a great idea! Thanks for the good 'how to' pics!
ReplyDeleteThis is so pretty! I am a new follower and I love your blog:)
ReplyDeletewww.karismaheartsavannah.blogspot.com
Love this pillow - thanks for the wonderful idea and clear instructions.
ReplyDeleteThis is just darling- great tute! I need one of these pillows and have the perfect fabric to try. Thanks !Hope you will show this off @ our weekend linky party going on! Happy Sunday!
ReplyDelete:)Kristi & Kelli
http://lollyjaneboutique.blogspot.com/
Thanks sooo much for all encouragement ladies!! And Kristen...I will have to look into getting a button...at this point I don`t have a clue how! Ha!
ReplyDeleteSo cute- I love how it turned out and love all those sweet ruffles!! Thanks for sharing this at Feathered Nest Friday! :)
ReplyDeleteWOW! This pillow is exquisite. Love the colors. And of course the ruffles!!
ReplyDeletewhat a cute pillow! adorable!
ReplyDeletevery nice pillow. The roses are very effective.
ReplyDeleteJanice
Thanks for sharing the tutorial. I love your pillow : )
ReplyDeleteA little red button in the middle of those blue flowers would make it all the more whimsical, for me at least. :)
ReplyDelete<3 it! Great job!
ReplyDeleteAdorable pillow and roses. I came by from Katherine's Corner. I am a new follower, Ginger
ReplyDeleteoops, already following but I am signing up for email so I don't forget and miss anything. xo Ginger
ReplyDelete