Showing posts with label painting. Show all posts

Wednesday, 18 January 2012

The Love of White, White, White!

Hello all!
Are you all still there??
I've been busy trying to figure out how to add more hours to my day...maybe you have the secret.
Please do share!

Alright, I kid...I haven't been trying to figure anything like that out.
I've been trying to get ORGANIZED.
I'm also discovering I have some sort of homemaking ADD.
Currently, I have two walls test painted on our main floor, one closet half organized, one armoire slightly emptied, a wreath 1/4 finished, and tea stained coffee filters laying around.
It's all part of my Ginormous 2012 Get Organized Plan.
Except maybe the wreath and coffee filters...that was merely a momentary creative escape.

Part of my Plan...and I am hoping to share it all with you soon...is to paint the trim in our house.


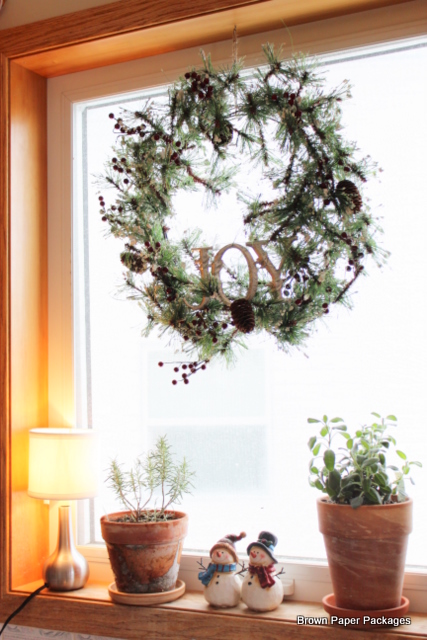
This is about the best picture I could find of the goldeny oak trim above the sink in the kitchen.
You can't see it here, but the sill was stained and rough and icky looking...plus it blended right in with the golden cabinets on either side. I know a lot of people love oak, so hopefully you won't be offended by me saying it's just. not. my. thing. And in our house...golden oak is EVERYWHERE. Floors, doors, trim, cabinets...all tied together nicely with a very blah, boring shade of beige wall paint.
EVERYWHERE.

The weather has been playing tricks on us in Alberta this winter so....

...all the springy feeling sunshine (I knew it was too good to be true!) simply forced me to whip out my paint brush. I painted....and painted...


...and painted some more....


Finally...a coat of primer and three coats of semi-gloss white later...I had a beautiful, shiny white window.


Sigh.
I'm so in love.


I almost love doing dishes again!
Oh, the refreshing power of white!!!!


Oh...and as for the weather?
It turned cold and snowy right after I finished my little painting project.
Definitely winter again - not spring - so I dashed outside to bring a few sprigs of spruce back in and "winter-ize" the sill. I like it.
Simple.
Clean.

Just the look I'm aiming for in the rest of the house.
Hi ho, hi ho....off to organize I go!

What have you been up to after "Christmas" was put away??

Tuesday, 23 August 2011

The Stenciling is DONE!!!

Well...I'm happy to say...IT'S FINISHED!!!
Those of you who have been reading the BPPackages Facebook page (a BIG thanks to all of you who have "liked" it!!) know exactly what I mean!!

That mammoth project called stenciling.
Errr...is it still called stenciling if you didn't actually use real stenciling techniques?

As those of you who have been reading since the beginning already know, hubby and I have been working away at changing up our cave-like bedroom. Here is ONE of the TWO pictures I was actually smart enough to take before we started painting.
*banging forehead*


Get used to looking at this pic. I'm going to have to use it lots in future posts about our room.
Anyhow, it was painted a really dark brown with golden oak trim, doors and flooring, not to mention very dim lighting from a ginormous ceiling fan that felt like it was only about three feet higher than the bed. It was virtually impossible to see anything in the closet. Blech. It didn't take long for me to make a trip to the paint store...you can read about that process here.
That was five months ago.
But now I'm happy to announce that we're...wait for it...about halfway to completion!!
Yeehaw!


Here's a half-way-done picture from roughly the same angle.
We painted the walls Light French Grey by Behr and then I hand painted/stenciled/whatever it's called...the "headboard wall" with Deep Silver by Benjamin Moore.
You can see a little peek of the new white closet doors...but that's a post for another day.
Our bedroom is the only room we've really touched so far, so that's why you can still see the oak trim on the outside frame of the bedroom door. It all takes time!

After we painted the room grey-blue, it started feeling a wee bit "icy" to me, so I thought that adding a now wildly popular trellis pattern to the headboard wall might soften things up a bit. I really waffled between white and black, but then I thought that might be a bit too harsh and wondered if a cozy, warm charcoal
might be just the ticket. Turns out it was. I love it.

Here's how we made it happen...


I browsed around a lot on the Internet to find a pattern that I liked. It shouldn't be a surprise to anyone that it was Jones Design Company who had the winning pattern! Have I ever mentioned how much I love that blog?! Patience is not my greatest virtue so I liked the fact that I could download the pattern right now and better yet, the fact that it was free appealed to my cheap frugal nature! If you are impatient and cheap frugal too, you can find the download here.

The size of the pattern changed a bit as a result of my printer running out of ink half way through. Yup.
So I had to fiddle around with it a bit when cutting out the pattern. As a result, I totally botched it up and had to resort to asking hubby for help with getting it right...which resulted in a larger pattern (fine by me...less painting!). As a result of that, my lines do not combine into one like Emily's do. But I'm still really happy with the overall result. After getting the pattern all sorted out, I traced it onto some white poster board and then experimented with several different brushes to see what I liked best. I highly recommend this!!


As you can see, it gave me something to practice painting on...which clearly I really needed!
I tried about four different brushes...you can see the different widths in this pic.
In the end, I decided a rounded brush worked best, since I didn't have to contort my body while I painted, which I did have to do with the flat tipped brushes.

(Did you notice? I painted my nails too...just for you!)
We made two stencils...one full pattern and one half pattern. I started in the farthest right hand corner above the bedroom door with the full pattern alternated with the half pattern and went along the ceiling. It may not have been the best point to start, but I wanted a less conspicuous place to get going since I knew most of it would be covered up by moulding anyhow.
You can see the process in this picture. Trace the pattern, then move it down about a half inch or so and trace again. Just keep going until you think you are going to lose your marbles.
Then take a little break and go at it again.


 I found it worked best if I moved the pattern down the wall, rather than working across the wall.
I don't know if using a level really helped anything other than to somewhat convince myself that I wasn't royally messing everything up. At any rate, I used this little level and lined up the stencil pattern with the traced out pattern above.


Then moved the level down to make sure the stencil was straight.
At some points, I just had to fudge a little to make it work.
Okay, in some places I had to fudge a LOT...put my pencil down and walk out of the room, deep breathe and once again ask myself what I ever did to feel I needed to punish myself this way.
Just sayin.


I alternated tracing and painting to keep myself sane from getting bored.
You can see here what I mean by a round tipped brush. It really does make the process much easier.


Just keep painting...just keep painting...painting, painting, painting...what do we do...we paint, paint, paint...oh, oh, oh, oh, oh, ohhhhhh!!!
(Can you hear Dory singing? Kay...so maybe Nemo is played a little too often around here..)
Keep painting on the inside of your traced lines.


Aaaannnndddd...the finished result!
I mentioned in a previous post that hubby wasn't at all convinced that he liked it. In fact, his first words were..."You said it was going to be subtle, Evie!" Errr....I thought grey was subtle. Compared to black.
Well, now he loves it. I knew he would.
 During the painting process, I wasn't so sure if I would love it though...I'm a big chicken and usually steer away from patterns. This was a big and very bold step for me...I sweated buckets over the decision to go ahead and do it or not..but I'm happy to say that I love it too. And really it's kinda like childbirth...the pain of the process is forgotten and now I just think about how much I like it and how it's going to be years before I ever repaint our room.


I couldn't get a straight on picture of the wall because I was trying my hardest not to get all the tools and furniture laying around into the picture. Our room is really rather small, so there weren't many places to stand without tripping on something.

Oh...see those sweet mouldings? Hubby's first attempt at crown moulding! I think he did a FAB job.
Thanks Honey...mwah! And a big, big thanks to my daddy-o for coaching and helping! I big, fat heart the chunky crown and baseboard. Yum.


And while I'm handing out thank-you's...
Thank you to my mom for watching the kiddies for countless hours while I painted...
thank you to Hubby for also watching kiddies during the hours Mom wasn't here...
and thank you to my kids for taking naps occasionally when neither my mom nor hubby were around...
and thank you to my producer...
and thank you to my fans...
without you, none of this would be possible...
*holding up my trophy and dabbing at tears*
*sniff*

I kid! I kid!

Now...onto the headboard and closet doors!! Stay tuned!!
If I'm very, very lucky they might be finished by the end of the week...

--------------------------------------------------


36th Avenue


Design Dazzle

Tuesday, 10 May 2011

Decisions, Decisions...


Does anyone else pick their paint colors this way?


What...you don't decide to match your walls to your hand soap?


Well I think I might. See that burgundy colored wall there?
(I'm sure there's a much less 80's era descriptive word for that paint color, but I don't know what it is. Sorry!)
I no likey. In fact, me hatey. Me want to draw all over that wall with felt pens....that's how much I don't like it! Thankfully it's just a small wall between the kitchen and living room. So I'm thinkin' hand soap aqua or perfume bottle turquoise might look just swell here. What do you think?

I'll tell you what I think! I think I love them both so much I'm not even gonna tell my hubby until it's done!! Wheeeeee!!! Happy post-Mother's Day to meeeee!!!

The question is...which one?

Wednesday, 30 March 2011

Project Get Rid of the Cave

I have to admit, I never registered the color of our master bedroom when we bought the house. We were on such a whirlwind tour of house hunting that by the time the deal was signed - I had no memory of what we were moving into.

Let's just say I was a leeetle surprised when I walked in to a dark, dark chocolate brown bedroom with ummm....oak trim and doors (sorry to all you oak lovers out there). At first I thought I could live with it for a while, even though I hated it. Well, all it took was one evening of trying to sort through our clothes and hang them up in the closet. I couldn't see a ding-dang-dong thing!!!! It felt so stinking cave-like in there!

In our first home - the one we just moved from - our master bedroom was our very first project, so I guess I never truly realized what a treasure it really is to have a beautiful room to retreat to at the end of a hard day of battling stubborn two year olds and drooling nine month olds (I only have one of each, but whatever), until now.

Here's a shot of that lovely brown that, in my opinion, is much better off found in a bowl of ice cream.


Don't get me wrong about brown. I like it! It would be stunning in a powder room with thick, glossy white mouldings and a pedestal sink. Maybe even throw in a chandelier! But NOT. WITH. OAK. TRIM. And definitely not in a bedroom with a small window. Blech!

So. We decided (everyone knows that means me, but hubs is pretty easy going about paint colors) to try a nice cool shade of grey-blue. Let me just pause here to say that I have been trying my very hardest to swing over to the contemporary side of the decorating fence for YEARS. But I've never quite been able to make it there. Some nice scrolly (is that a word? It rhymes with trolly) piece of iron work would always catch my eye and steer me back to the Old World fence. Arrrr! Well, this time I am breaking loose and I'm gonna make it over to the contemporary side!! (But...maybe hold me accountable, just in case, okay?) Thus the grey-blue paint.

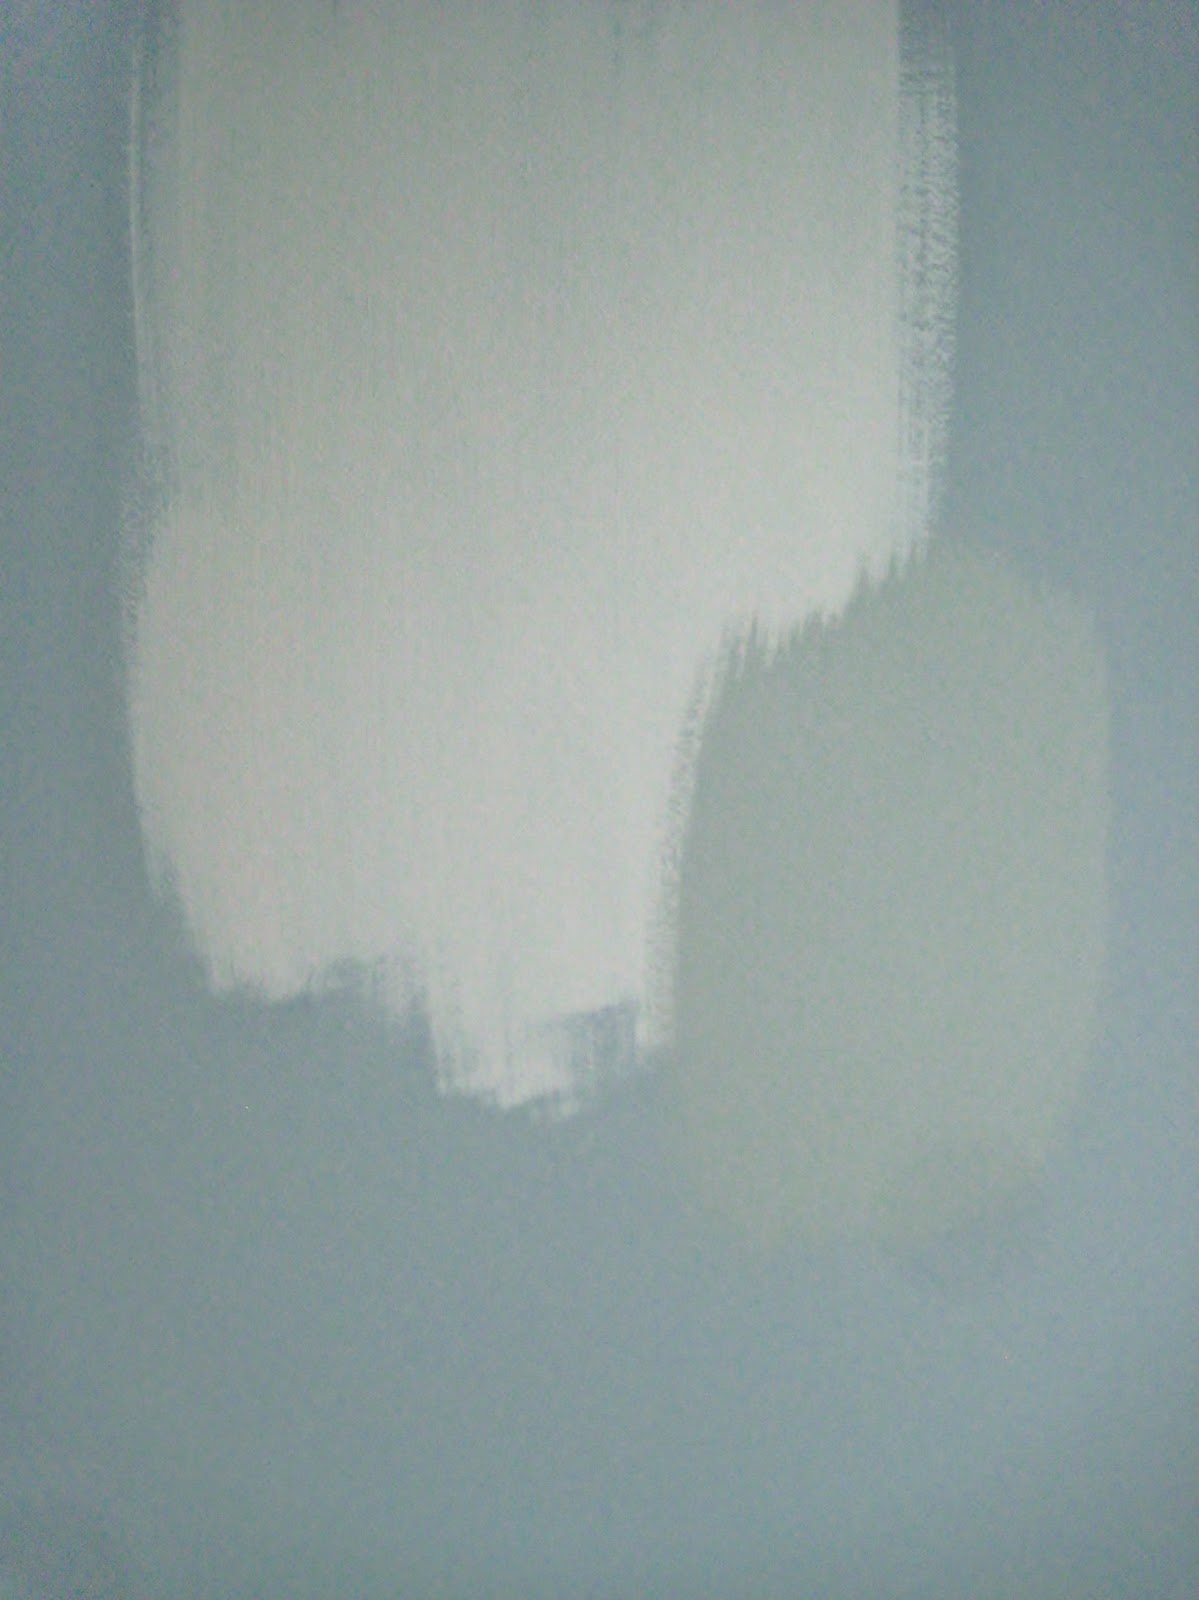
Well, let me just say "they" aren't kidding when they say it's tough to find the perfect shade. At the first swipe of cutting in, I fell in love. Oh yummy in my tummy. And then a few more strokes around the room and lots of worried glances at the drying paint and....I realized that this color was NOT going to work. Hubby tried his hardest to convince me that I was nuts and it was a fantastic color. Just what we wanted! But I know he just hates painting. And he doesn't call me stubborn for nothing. It just felt like a baby boy's nursery in there. 

This is where those nice little pots of paint samples come in reeeeeally handy. On our next visit to Home Depot, I snatched one up in a big hurry and asked the nice paint lady to mix me up a nice new shade of grey-blue. Aaaannnd I tried again. Nope...way too light...almost white. The color right below it on the paint card looked like it just might be the shade I was going for. So...another 45 minute drive to Home Depot and a 5 minute rant to the above nice paint lady about how neither of the paint colors have worked and neither of them exactly matched the paint chip and it had better match this time so you better give me a matte paint...or...is the primer and paint in one better...well all I really care about is that the PAINT MATCHES THE CHIP this time. Above nice paint lady's eyes glazed over as she politely asked, "Ummkay. So do you want matte or eggshell?"


After all the drama and ranting and raving, we lived with the three colors all slapped together on every single wall for about a week. I inwardly worried that the third shade was going to be too grey but I figured it might just be a case of three-strikes-and-your-out-honey, so even if it was too grey I knew I'd be living with it. Hubby really hates painting.

Well, after the worlds longest post, I'm happy to tell you that we painted. Hubby lived. And I. laaahuuuvvvvve. it.
And I have no pictures of it. Yet. But until then - take my word for it, it's a silky, calming, bluish-grey that smacks perfectly of contemporary design. Yesssss!!

Stay tuned for pictures and updates. They're coming, I promise.

And for anyone else on the quest for the perfect shade of grey-blue...it's Behr's Light French Grey. Yum.

Related Posts Plugin for WordPress, Blogger...